7 Essential steps to process raw lumber flat, straight and to dimension

Quick steps to flatten wood

Flaten Wood.jpg

Looking for easy to follow steps to flatten wood? This quick guide with video tutorials will show you the exact steps needed in order to process raw lumber and flatten wood.

By the end of this free training you will have what you need to begin building fine furniture, millwork, and any other high quality woodwork.

Each section and step below is accompanied with text and video training.

Flattening wood: What you need to know before you start

In the process that produces kiln dried rough lumber, each step can add twist, cup and bow warp. It is not flat. Since the lumber is long the curve extends outside of an imagined flat board of standard finished thickness.

Manufacturers make finished lumber smooth faced and to a standard cross section, but they cannot make it flat without cutting it too short to be sellable.  

Most shop projects require flat straight lumber of precise cross section dimensions. Since we know what our lengths will be, we can cut our boards shorter, then flatten them.

You cannot buy it flat, but you can buy it at full rough thickness, or very lightly planed with a smooth surface. Shops buy their lumber as either rough sawn, or “hit and miss” that is lightly planed to a still thick standard but mostly smooth.

1. Buy wood milled for commercial shops

You will usually need to source your wood commercially or at a specialty shop for recreational woodworkers. Here in Seattle we have the rare advantage of a lumber yard that sells the commercial products in a retail environment where you can pick it yourself.

2 Rough saw the wood slightly oversize

For each cross section dimension in your batch rough saw enough pieces from material that is thicker than the finish dimension. Each set of rough material should match the width + ⅜” and the length + 6”.

You are making material, NOT the actual length required. 

Do not rough out much longer than about 4’ unless the finish size is greater, and do not rough out less than about 18” since anything shorter will be hard to control.

As an example, you may need 5 pieces 6” long, and two pieces 30”, actual finished length. You would rough out one 36” piece for the 6” pieces and two 36” pieces for the 30” pieces. (5 x 6 = 30 plus two more at 30 require 3 pieces at 36”)

3. Test and mark the wood for crown and twist warp

To mark the wood with subtle precision you need a flat surface to set the wood on and test it by seeing how it rocks on the flat surface. Visual testing only gets you so close, and it is nearly impossible to detect twist by eye.

Genuinely flat surfaces are rare and usually have to be built intentionally with flatness in mind. Every jointer has two flat surfaces, and for longer pieces a good flat table is needed.

Our symbols for marking up the wood allow you to see exactly how to hold each piece to avoid rocking as you feed it over the jointer by hand. If the wood tips out of a flat plane while passing it over the jointer it will not come out flat.

4. Joint concave face flat

Jointers are used to produce flat faces and straight edges on lumber. Using the marking from step 3 above you joint the face opposite the crown (the hollow side of the bow) to produce the first flat surface. 

The video in section 3 gives you good instructions on how to hold the wood when feeding it over the jointer, and this section provides a good visual of the jointer’s cutting action

5. Plane convex face flat

Planers make a smooth surface and are used to produce a given thickness. They will copy whatever shape exists on the bottom to the top, therefore the jointer must first flatten one face..

6. Joint one edge straight

Now that the board is flat on both faces it is ready to return to the jointer to straighten one edge. At this point either face can serve to help guide the travel over the cutter. Both the table and the attached fence are used for control. The board is stood on edge on the table to produce straightness, and pressed against the fence to make sure the edge is ninety degrees to the face.

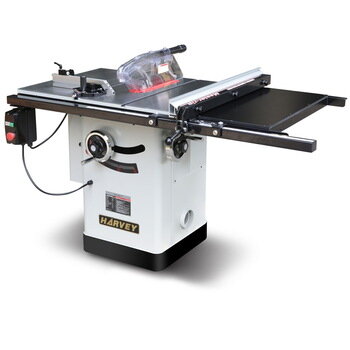
7. Use the table saw to rip to final width

The planer copies a flat face to the opposite face and the table saw copies a straight edge to the opposite edge, with the straightened edge held against the table saw’s rip fence. The rip fence is set to the desired final width, as the planer was set to the desired thickness. 

The wood is now flat straight and to dimension, ready to cut to length.

For more woodwork training and tips, make sure to check this site frequently. You can also take advantage of our shop membership and subscription packages where you will get access to a large shop with high quality commercial equipment along with expert mentoring so you can build your woodworking projects with confidence.

Check out the available woodworking packages and get started today

Jointer Training

The jointer is the second of the three most important machines in a woodworking shop. It enables the woodworker to produce flat and straight faces and edges on raw lumber, which always comes with some warp and twist. This video teaches you the basic function of the jointer, as well step by step for measuring, marking, and flattening a rough board.

Thickness Planer Training

The thickness planer is designed to produce a board of a constant thickness, depending on a movable table and a scale to set the thickness. The table adjusts in height to vary the distance between it and a cylindrical cutter head that is mounted above the table. As wood is fed into the planer it is picked up by a powered feed roller that presses it down and carries through the planer under the cutter head. Any part of that board that is thicker than the distance from table to cutter head will be machined off to produce a constant thickness.

Thickness planers cannot produce a flat board with no warp unless one face has already been flattened with a jointer.

Miter Saw Training

Miter saws are for “crosscutting” or cutting cutting across the grain of wood (or across the shorter direction if the material has no grain). Miter saws are designed to crosscut at an angle, which is called a miter cut. They are quick to use, and also capable of precision finish cuts. A miter saw would be the first choice for cutting a picture frame.

Panel saw training

The sliding panel table saw is essential for any for profit cabinet making shop. Panel saws of this type are equipped to cut a perfect straight edge up to 10’ long, then slice it into strips of various widths. Those strips are then crosscut to quickly produce all the parts for a cabinet or set of cabinets with high precision. Panel saws are equipped with a special scoring blade that eliminates unsightly surface tear out.

Band Saw Training

Band saws handle almost any full saw cut a woodworker might need to make. The band saw can be a workhorse when cutting lengthwise (ripping) and is capable of cutting all the way through a board held on edge (re-sawing). IsGood Woodworks has a band saw able to cut up to 24” of wood thickness.

Band saws are also capable of making tightly curved cuts, depending on the blade width. The tables can tip so that a bevel, or a combination of a curved cut with a bevel can be made. They are not a full substitute for a table saw, but if you are limited in budget and space, a band saw can cover a greater range of cuts.

Wide Belt Sander Training

Wide belt sanders have a wide sanding belt on a pair of rollers above a height adjustable feed table. Wood or other material is run between the bottom of the sanding belt and the top of the feed table with the space between set very slightly less that the wood thickness. Wide belt sanders produce a very flat smooth surface in a fraction of the time it takes to sand with portable sanders.

Wood Properties

Any aspiring woodworker will benefit from understanding an important set of properties of wood that are not obvious on the surface. These properties are not present in most materials that you would create with and indicate special consideration and practices for success. Wood can be a trickster if you do not understand it’s once living side.

15 Tools and Equipment Every Serious Woodshop Should Have

If you're looking into the woodworking business, or serious hobby work, there are some workshop tools and equipment that you'll need to own. The following machines are in order of most to least essential, followed by portable power tools. You actually can start with portable tools and do some good work, but this article is about fully equipping a small shop.

Table Saw

table saw.jpg

The table saw is central to the woodshop. They range in size and cost from very large production machines to small portable versions suitable to carry to a job site. All of them work in basically the same way.

A motor is mounted beneath a steel tabletop that holds a circular saw blade on a spinning shaft extending from the motor called an arbor.. The motor and blade can be tipped to an angle to cut a bevel cut along the length of a board. The machine also is equipped with an attachment called a miter gauge that rides in a slot on the steel top to guide cuts across the board. Lengthwise cutting is called ripping, and cutting the narrow direction is called crosscutting.

Jointer

jointer.jpg

This tool is used in conjunction with a Thickness Planer. It flattens and smooths the face of boards that are warped or twisted prior to sending them through the Planer to produce a given thickness. The jointer is also used to straighten edges before taking them to the table saw to cut them to a given width.

Thickness Planer

thickness planer.jpg

The thickness planer is another very important tool no woodshop should be without. After the lumber is made flat on one face the planer will take it down to the desired final thickness and produce a smooth face. 

Like the jointer, the planer has a spinning cylindrical cutter head with straight knives. As the wood is fed into the machine it is picked up by power feed rollers that carry it under the cutter head to produce the desired thickness.

Compound Miter Saw 

miter saw.jpg

This tool is designed for crosscutting and can simplify such cuts compared to the table saw. Since the wood is what moves on the table saw, sufficient clearance for making crosscuts can be difficult. The miter saw almost always is set against a wall and the wood simply dropped down and cut.

This is a portable tool but because of how it works, it’s highly recommended you use it with an extended table on the front and back for extra stability. This is not only for the saw, but it’s also for the material being cut. Some pieces can be quite long.

The saw itself is a circular saw mounted on a table with an arm that has a rear pivot. Blades are between 8 and 15 inches in diameter with most jobs needing 10-12 inches. The diameter determines the max-width of the cut. The blade and motor can be tilted to one side together for miter cuts and the blade alone can be titled again allowing for the compound miter cut. A compound miter cut is two different angles being cut at the same time.

Air Compressor

air comp.jpg

In this day and age where most tools are powered, this has become one of the most important pieces of equipment in any kind of shop but especially the woodshop.

It is usually a round tank full of compressed air with a set of regulators. One regulates the pressure in the tank, and the other regulates the pressure of the air leaving the tank typically via a hose. There’s also a motorized pump and the necessary power switch. Everything is then housed in a metal frame with or without wheels and a handle.

Drill Press

drill press.jpg

The drill press is akin to a portable drill, except the drill itself is built into an assembly that controls the movement of the drill bit in a constrained vertical direction while the material is placed on a table below the drill bit.

The drill press comes in two models, the free-standing floor model and the portable one you can mount on your workbench. The drill press has a fixed motor and a pulley system to transfer rotation to a vertical shaft. The vertical shaft carries a drill chuck designed to clamp a variety of sizes of drill bits extending out of the bottom end of the shaft.

There is a lever arm that is moved in a circular fashion to lower the shaft and drill bit into the wood. It is spring loaded to allow the shaft to return to the top position when the lever arm is released

Like a hand drill, it has a chuck where you attach either drill or driver bits. Once it’s secured, you use the lever to lower the chuck to the workpiece. Once it’s done, you release the level, and a spring sends the chuck back up again. The table is adjustable to the size of the workpiece.

Band Saw

bandsaw main.jpg

The “band” of a band saw is the blade which is a long hoop of metal with teeth along one edge. The blade is looped over two wheels one above the saw table and one below the saw table. The wheels are pressed apart to tighten the blade hoop against the wheels and provide considerable tension to the section of the blade that is vertical from one wheel to the other. The body of the band saw is basically a C shape designed to hold the two wheels, the table, and a motor on the lower wheel to drive the blade.

Disk and Belt Sander

tablet and belt sander.jpg

This is a two for one combo tool.  It has a stationary disc sander set up vertically on one side, and a stationary belt sander set up horizontally on the other side. Between them there is and electric motor and a pair of round drums. One drum runs the motor for both sanders while the second drum keeps tension on the belt sander. 

The belt sander uses sandpaper in a wide variety of grit as well as width and length. The disc sander uses discs that come in a large assortment of sizes with the most commonly used sizes being 4-8 inches in diameter.

Circular Saw

circular saw.jpg

This saw is one of the best for a beginner just learning how to cut wood. It can handle rip cuts, bevels, and cross-cutting with ease. This tool can be handheld or mounted to your workbench. Most use it with a pair of sawhorses to hold the wood to be cut. The blade can be adjusted for depth so the user can cut dados, cut-offs, and narrow slits.

The mobility and versatility of being hand controlled help it to be a quick way to make a cut that does not need high accuracy. It is a table saw without the table.

Power Drill

A drill should be owned by everyone, not just woodworkers.  It’s very versatile when it comes to fastening screws or boring holes. A handheld drill can be converted into a press drill when you need one. It has a chuck for holding all manner of drill and driver bits, and it can be used anywhere.

Jigsaw

This tool is a hand held power tool designed to make curved cuts. The piece of work is held stationary, usually in clamps. Blades extend out of the bottom of the saw’s foot and reciprocate up and down to make the cuts

Router

This hand tool has a huge selection of bits to fit practically any type of job the customer (or spouse) wants from you. It’s mainly used for hollowing out circular areas on the face of wood, but like the scroll saw, it can also be used for cutting dovetails and dados, adding profiles to crown molding, cutting patterns on the face of wood, and adding decorative edges.

Shop Vacuum

This piece of equipment is a major must-have for cleaning up your woodshop. Made almost completely of plastic, this vacuum doesn’t use a bag. It can be used to pick up everything from nails and screws to oil. 

The takeaway

As important as these tools are, the budget required to purchase this equipment is out of the question for most people.  This is where renting space and accessing these tools makes all the difference. IsGoodWoodworks offers competitive shop and equipment rental rates along with a variety of training and certification programs.

This is the perfect solution for anyone looking to save money but wants access to premium grade equipment in a large, efficiently designed shop.